Load
Via the GUI
While logged in to the bclink web-gui as the 'data' user.
Create a new person table [optional]
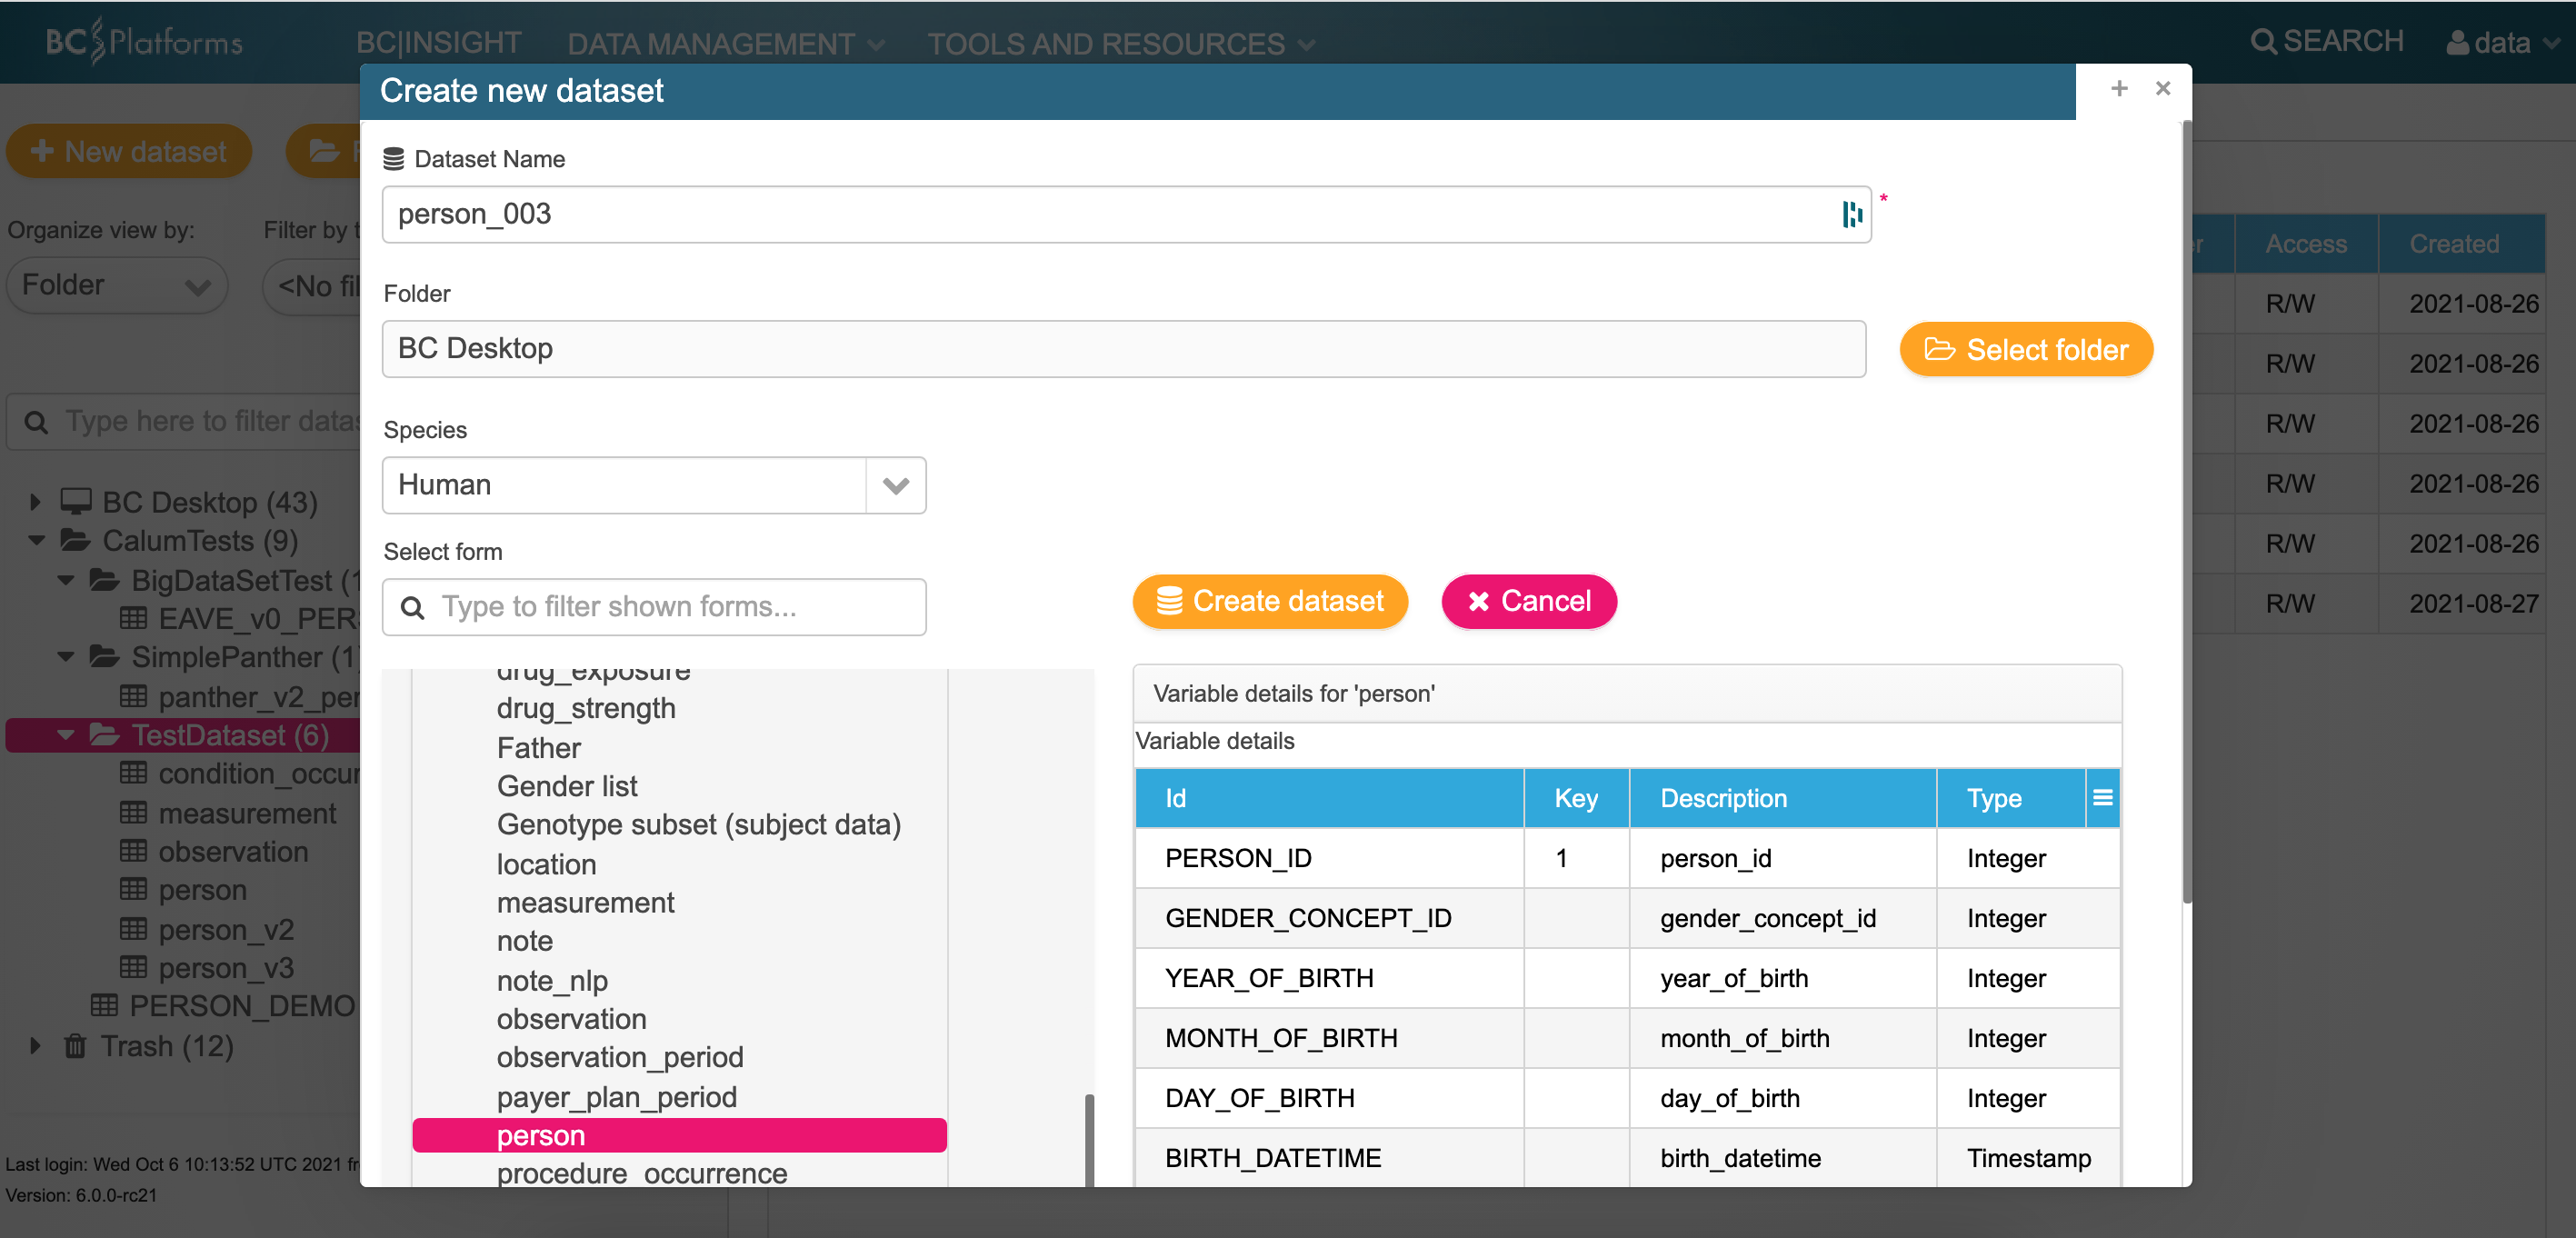
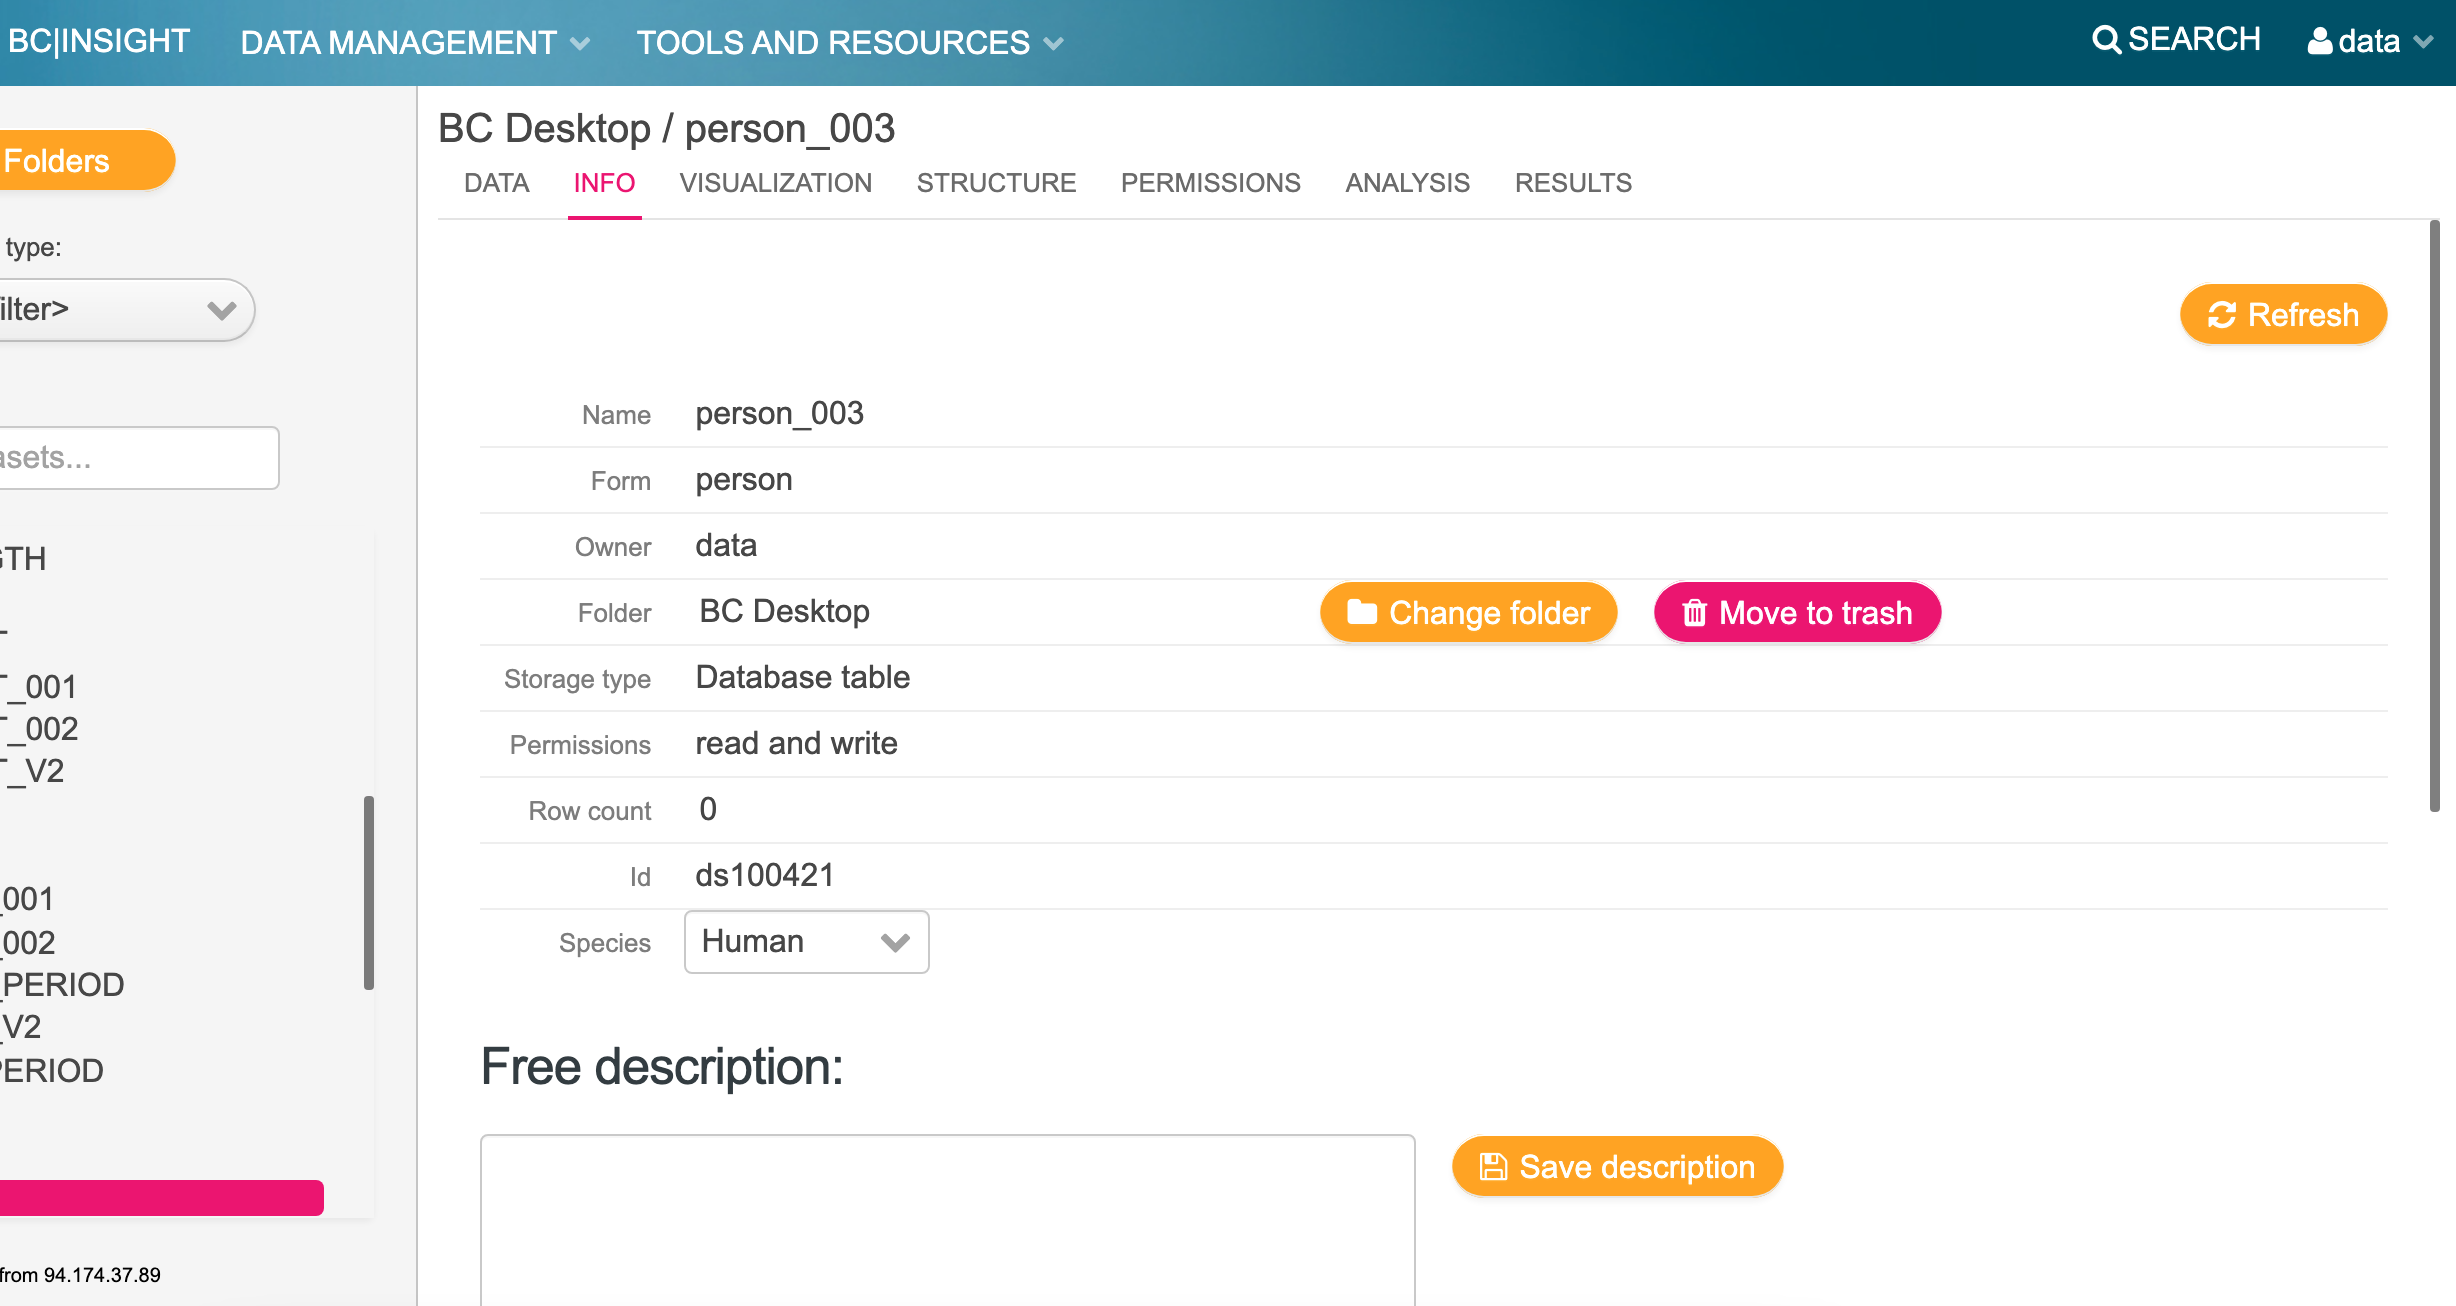
Viewing the info:
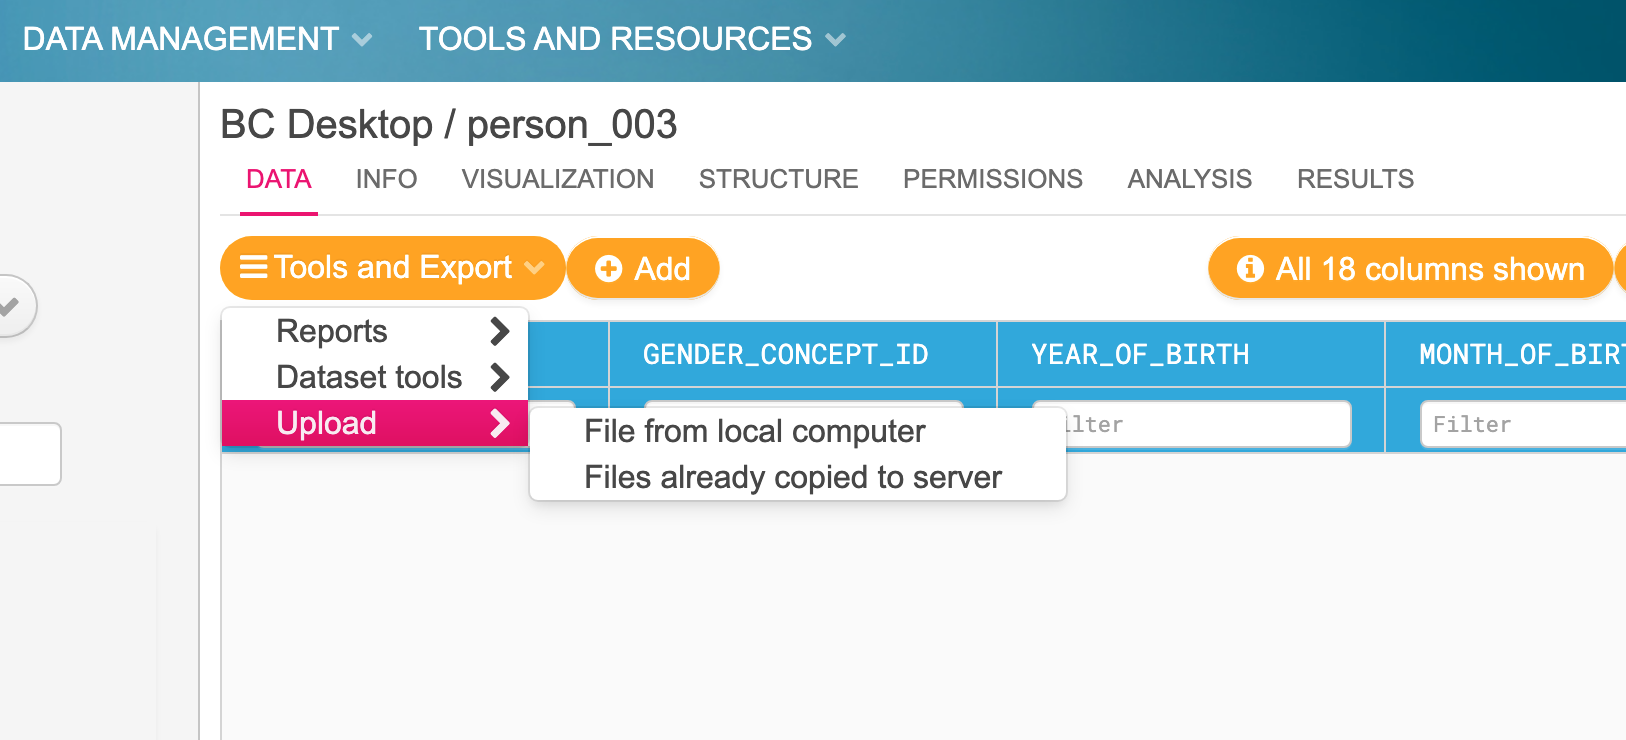
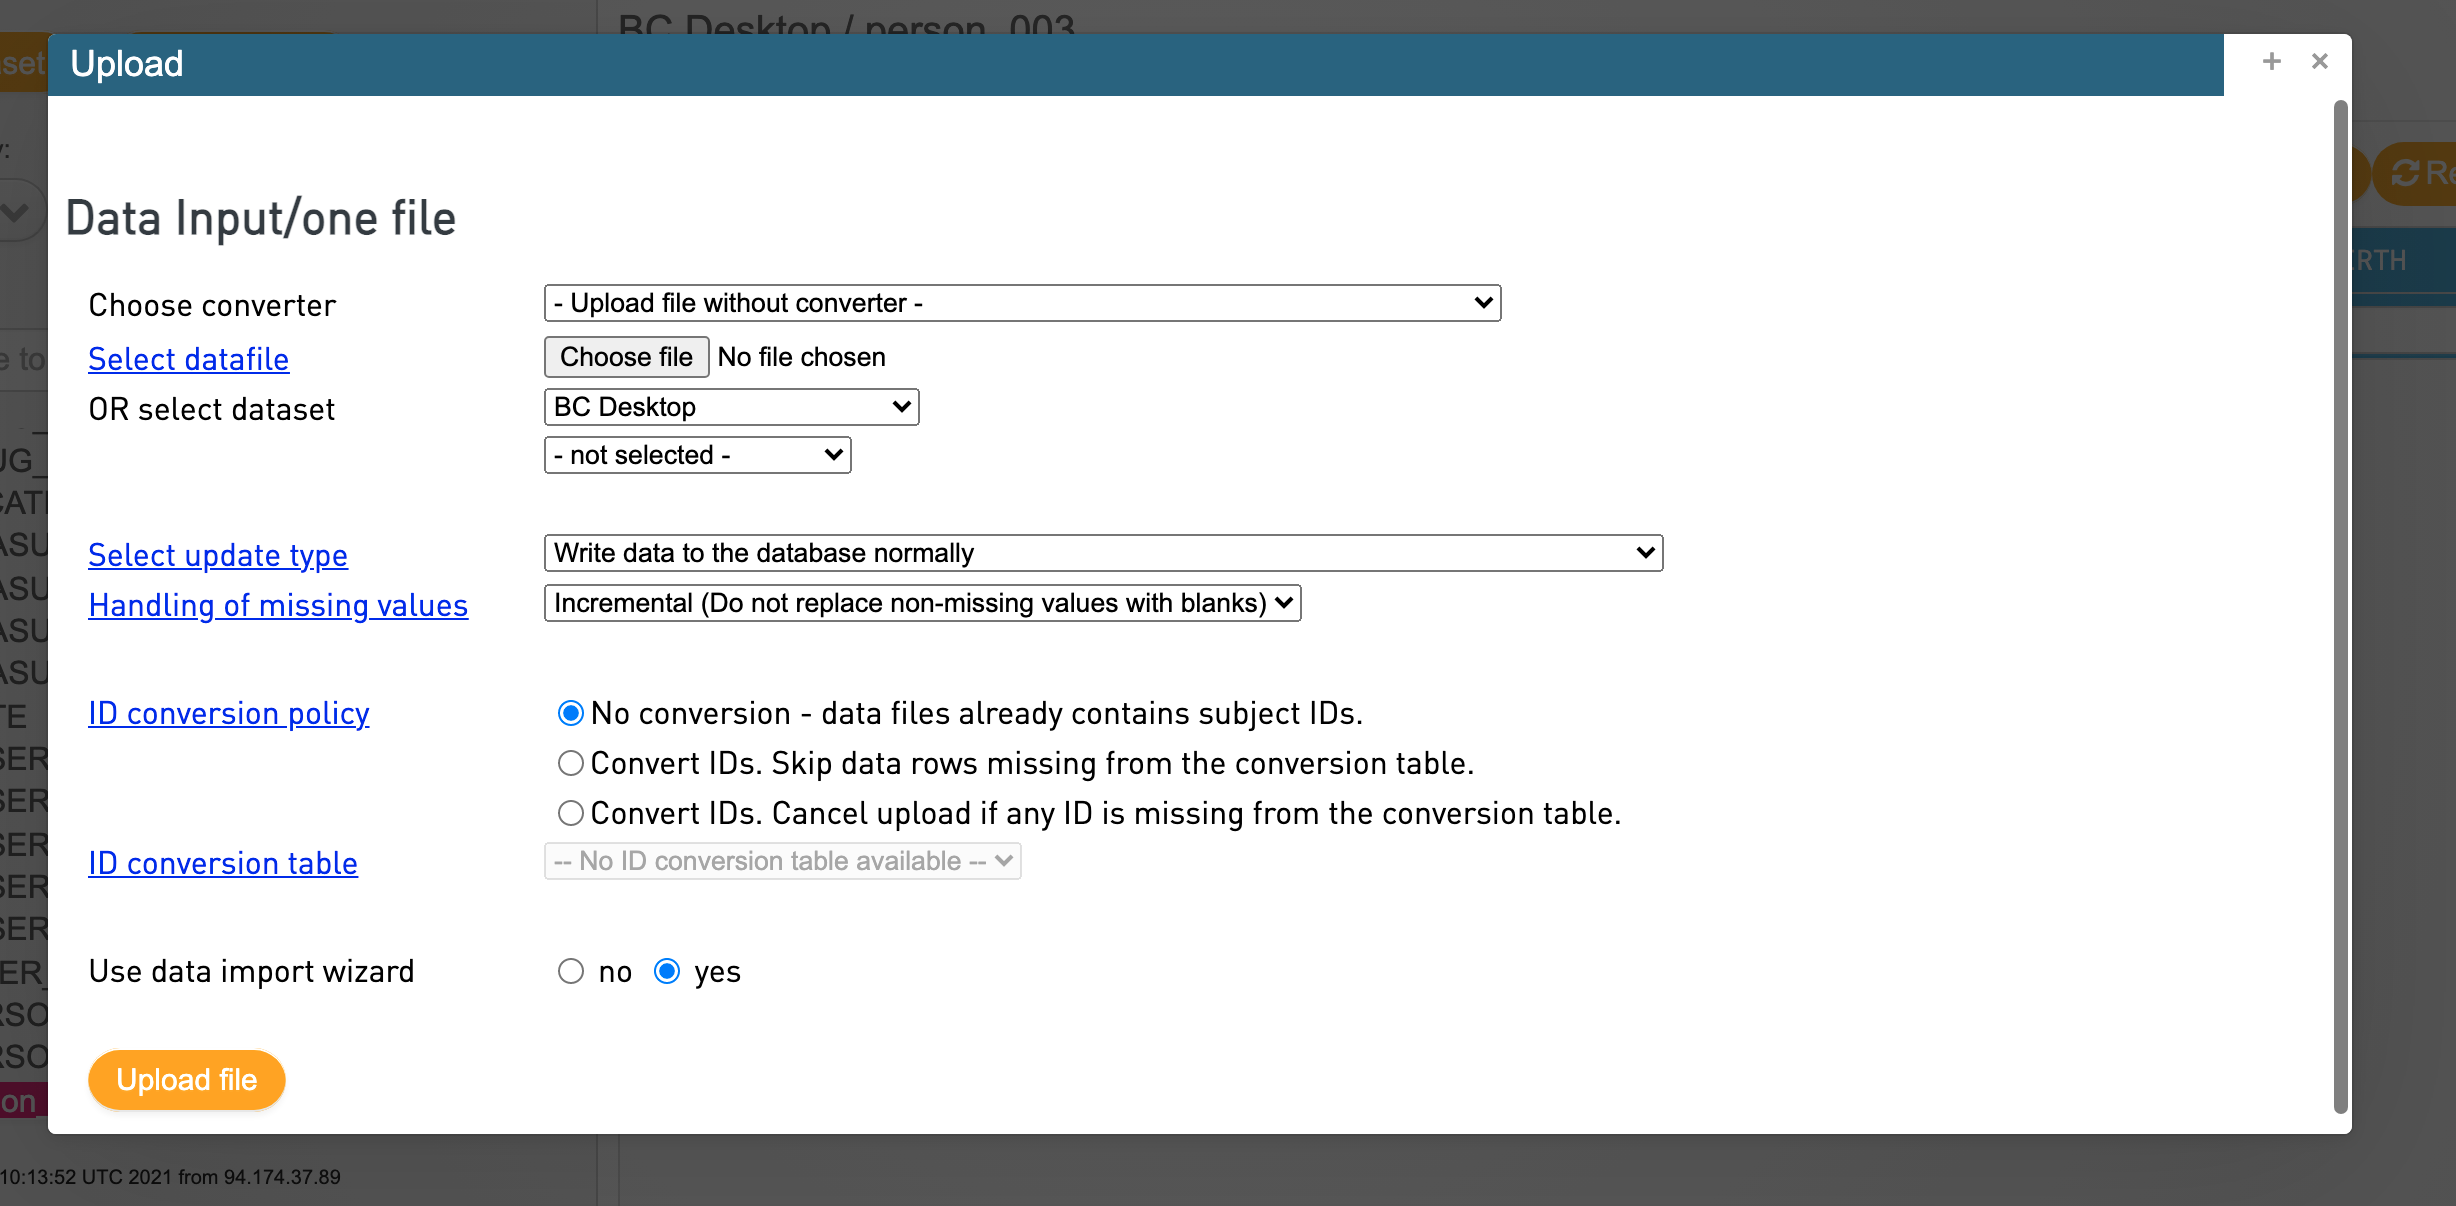
Upload data
Via the CLI
ssh into the VM
Log in to the VM hosting bclink and switch to the user bcos_srv:
ssh XX.YY.ZZ
sudo -s
su - bcos_srv
Setup a working directory
Create a new working directory
mkdir /usr/lib/bcos/MyWorkingDirectory/
Prepare files
Move the tsv files created by the carrot-cdm transform into this directory, e.g. in a subfolder mapped_data:
mapped_data/
test/
├── condition_occurrence.tsv
├── masked_person_ids.csv
├── observation.tsv
└── person.tsv
Get the name(s) of the tables
The default bclink table for "person" will be named person. However, you may want to create your own tables via the command line or via the GUI. As in the previous example, a person table could be created with the dataset id ds100394.
Clean the database [optional]
datasettool2 delete-all-rows ds100394 --database=bclink
Load the data
Use dataset_tool to load tsv files into the database (default name is bclink) as the user data (so you are able to view the upload jobs via the web GUI.
The flags --support & --bcqueue make sure the data file is uploaded as a job to the bclink batch queue.
Example:
dataset_tool --load \
             --table=ds100123 \
         --user=data
         --data_file=mapped_data/person.tsv \
         --support --bcqueue \
         bclink